
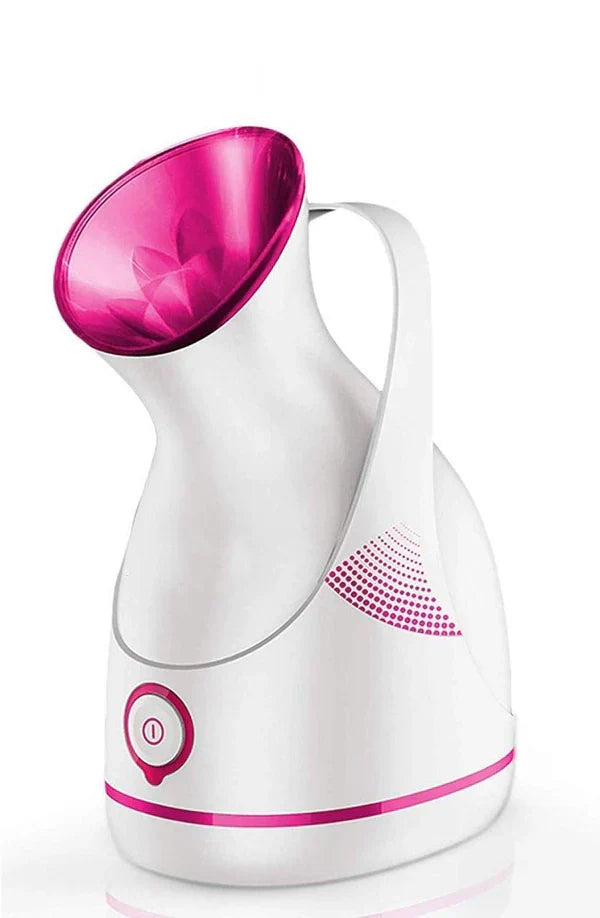
How to Use a Facial Steamer for Glowing, Clear Skin at Home?
Are you always stunned seeing the dewy, radiant complexion that celebrities flaunt? If yes, you should know their secret. A facial steamer is most certainly part of their skincare routine.
Using a facial steamer at home is one of the easiest, most effective ways to level up your skincare routine. It not only gives your skin a spa-like treatment but also enhances the results of the products you already use.
In this guide, we’ll break down how to use a facial steamer properly, the benefits you’ll experience, and some pro tips to make the most of every steam session.
Why Use a Facial Steamer?
Before we dive into the "how," let's talk about why facial steaming is such a game-changer:
-
Opens pores and helps loosen dirt, oil, and makeup residue
-
Boosts circulation for a natural glow
-
Hydrates skin and promotes better absorption of skincare products
-
Soothes sinuses and helps relieve nasal congestion
-
Promotes relaxation, making it perfect for stress relief
Step-by-Step Guide: How to Use a Facial Steamer at Home
Step 1: Cleanse Your Face Thoroughly
Start with a clean canvas. Wash your face with a gentle cleanser to remove surface dirt, oil, or makeup. This helps prevent any impurities from being pushed deeper into your pores during the steaming process.
Tip: Use lukewarm water—not hot or cold—for cleansing to avoid shocking your skin.
Step 2: Fill Your Steamer with Distilled Water
Avoid tap water, which may contain minerals or impurities that could clog your device or irritate your skin. Instead, use distilled or purified water.
Fill your facial steamer's tank according to the manufacturer’s instructions, plug it in, and let it start warming up (usually takes about 1–2 minutes).

Step 3: Position Your Face at a Safe Distance
Once the steam begins to flow steadily:
-
Sit comfortably
-
Keep your face about 6–10 inches away from the nozzle
-
Close your eyes and relax for 5–10 minutes
Don’t steam longer than 10–15 minutes, especially if you have sensitive or acne-prone skin.
Bonus Tip: Drape a towel over your head to trap the steam for a more intense session.
Step 4: Optional – Extract or Exfoliate (Gently!)
After steaming, your pores are open and soft, making it a great time to:
-
Gently exfoliate dead skin cells
-
Use a blackhead removal tool (with extreme care)
-
Apply a detox mask or clay mask
But be gentle—your skin is more sensitive right after steaming, so avoid harsh scrubs or aggressive squeezing.
Step 5: Rinse & Tone
Splash your face with cool water to close the pores back up and pat dry with a clean towel. Then apply a toner to balance your skin’s pH and remove any lingering residue.
Step 6: Moisturize & Treat
This is the best time to apply your favorite serums, moisturizers, or facial oils. Your skin is more receptive now, so products penetrate more deeply and work more effectively.
For an extra glow, use a hyaluronic acid serum followed by a nourishing moisturizer.
How Often Should You Use a Facial Steamer?
-
Oily or acne-prone skin: 1–2 times a week
-
Dry or sensitive skin: Once a week or every 10 days
-
Normal/combination skin: Once a week is usually enough
Overdoing it can lead to irritation or dryness, so always listen to your skin.
Extra Pro Tips for Glowing Results
-
Add essential oils or herbs (like lavender, chamomile, or green tea) to enhance the experience
-
Use your steamer before a big event for a quick glow-up
-
Clean your device regularly to prevent bacterial buildup
-
Avoid steaming if you have rosacea, eczema, or sunburned skin
Final Thoughts
Facial steaming is one of those rare beauty rituals that feels luxurious but is incredibly easy to do from home. With just a few minutes each week, you can refresh your skin, unclog pores, and amplify the effects of your skincare products—no spa appointment needed.
If you're looking to achieve glowing, clear skin without breaking the bank, a facial steamer might just become your new skincare BFF.
Read more

Face Shaping 101: How Face Massagers Can Sculpt Your Jawline Naturally
Today, many people are obsessed with snatched jawlines and sculpted cheekbones. While there are many invasive and non-invasive solutions available, most of them prefer to opt for non-invasive tools...
Read more
Top 6 Benefits Of Using Wellness Products In Your Daily Routine
Caring for your body doesn't necessarily mean making huge changes. Many times, little things added to our daily habits can be the most impactful. This is exactly where the best wellness products ...
Read more